Monday, August 24, 2009

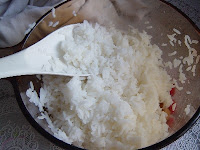
Jasmine Rice with Chicken Sauce - Khao Rad Na Gai


My mum's famous dish is Khao Rad Na Gai. The tips are to use a lot of Pepper seed and Coriander roots, blended and mix with Chicken and soy sauce overnight.


Let's try this delicious recipe.


Ingredients: (for 5-6 serves)
- 1 tb.sp. Pepper (seed)
- 4 coriander roots
- 400 g Chicken breast (no skin needed)
- 2 tb.sp. soya oil
- 3 tb.sp. Soy sauce (2 tb.sp. for premix and 1 tb.sp. during cooking)
- 1 tb.sp. Black soy sauce (sweet soy sauce)
- 1 tb.sp. Maggi sauce
- 1 tb.sp. white sugar
- 2 tb.sp. corn flour, dissolve in 1/2 cup water, stir well
- 1 1/2 cup clear chicken soup or just hot water
- 1 cup mushroom and/or other vegetables like onion, carrots or cabbage
- Steamed jasmine rice (cooked by rice cooker or microwave)


Cooking:
1. Use blender to blend pepper and coriander root
2. Mix with chicken and soy sauce, keep in the refrigerator overnight
3. Preheat the pan and oil, use medium heat
4. Add Chicken, stir well until cooked
5. Add chicken soup or hot water, wait until boiled
6. Add black soy sauce and sugar and vegetable, stir till cooked
7. Slowly add starch solution until thickened
8. Serve on top of jasmine rice, season with pepper and decorate with fresh chilli

Thursday, August 20, 2009

Jasmine Fried Rice with Shrimp


Ingredients:


- 14 shrimps
- 1 1/2 cups steamed Jasmine Rice (better cooked and kept in refridgerator overnight)
- 2 tb.sp. Vegetable Oil
- 2 large eggs
- 2 cloves chopped garlic
- 1 tb.sp. Oyster sauce
- 1 tb.sp. Soy sauce
- 1/2 t.sp. pepper
- 2 tb.sp. Onion leaves chopped


Cooking:
1. Prepare shrimps by pealing off the shell and head
2. In a bowl, premix Jasmine Rice with Soy sauce, Oyster Sauce, mix well.
3. Heat up pan and vegetable oil
4. Put shrimps in the pan, stir until cooked (orange color), place in a dish (will put on top of fried rice)
5. Use medium heat, pour garlic into the pan, stir til light brown
6. Knock the eggs into the pan, while half cooked, add rice
7. Stir rice gently for approx. 4 mins, add pepper
8. Serve on dish, decorate with onion and shrimp


Wednesday, July 22, 2009

Cooking Brown Rice

Brown Rice has become very popular for those who concern more about healthy food. It's the type of rice with least polishing to remove rice shell. Most of Vitamins are still maintained in the rice. It also contains fiber, unsaturated fat, high vitamin B, Niacin, Calcium, Phosphorus, and many others. It's good for the body and it's a good organic food dieting.

Although brown rice is very healthy, but cooking brown rice is not easy. For many elders (especially my mum), they say that brown rice are too hard to eat.. and not so soft.

There are a few simple technics:

1. Mix brown rice with white rice. You can add 1/2 part of brown rice and 1/2 part of white rice. Soak in water 4 parts for 1 hour. Then cook in your rice cooker normally.

2. If you want pure brown rice, I recommend a presoak of up to 2 hours. This will help soften down the rice, and when cooked in the rice cooker, add 20% extra water.

However, these technics really depend on which type of brown rice, how old the rice is (usually newer rice needs less water). And what type of rice cooker you're using. Just keep trying for 2-3 times and remember to presoak before you cook and you may need extra water.

I personally love to mix brown rice with jasmine rice. This gives out nice texture and nice smell. You will get softness and good smell of jasmine rice with slightly sticky chewy of brown rice.. and moreover.. it's healthy!!

Sunday, June 28, 2009

Tips for Fried Rice

Have you ever cooked fried rice and found you don't really like it? Have you ever wonder why those restaurants can make delicious fried rice but you can't? Was your fried rice a bit damp?

I also had these problems until I learnt from my mother-in-law that there's a few tips you MUST know about making good fried rice.

These are quite simples.

1. Rice must be cool and dried. DON'T use rice that is just cooked and while it's hot. If you do, your fried rice will turn out wet and the rice will be broken. The best is to use rice that's been kept in the fridge (open in a bowl) to make it dry for overnight. While cooking rice in the rice cooker, use less water than normal. Jasmine rice is highly recommended.

2. Fry-pan must be iron. Old pan is better than new pan.

3. Heat - very very important! The stove must be very hot, like in chinese restaurant.

4. Generally.. you should follow these steps:

- Heat the pan
- Add vegetable oil
- Add garlic, stir til brown
- Add meat ingredients.. e.g. pork, shrimp, sausages, etc. stir until cooked
- Add sauce ingredients e.g. soya sauce or Maggi
- Beat eggs in a bowl, pour into the pan. Tilt the pan so the egg covers flatly in the pan. Leave for 8 seconds.. (longer than this the egg will become hard.. 8 seconds for me is perfect because the egg will cover rice nicely while some part of the egg is hard enough)
- Add rice, stir gently so it's covered with egg
- Stir quickly but gently until rice is hot (this is why it's important to use high heat stove)
- Add vegetable ingredients e.g. onion leaves
- Sprinkle with pepper, serve on the dish

Please try my technic and you'll find your fried rice is more delicious than ever!!

Sunday, June 7, 2009

Pork Satay and Satay Peanut Sauce Recipes


It was my mother's 67th birthday in May 2009. We had a great dinner together and the most favourite dish for my mum was Satay. Although she's 67, but still very healthy.


Satay is a fun menu for the party. It doesn't take long time to prepare and you can enjoy grilling it on the barbecue.


Ingredients (for pork satay):


500 grams Pork


1/2 t.sp. Coriander seeds, ground

1/2 t.sp. Fennel seeds, ground

1 tb.sp. Lemongrass, fine chopped

1 t.sp. Cumin powder

1 tb.sp. White sugar

3 tb.sp. Condense milk

1 tb.sp. Butter

1/4 t.sp. Salt

2 tb.sp. Vegetable oil

1/2 cup Coconut milk for seasoning while grill

Ingredients for Satay Peanut Sauce :

1 cup Peanut

4 dried chillis (large)

1/2 t.sp. Salt

2 t.sp. Lemongrass fine chopped

1/4 t.sp. Bergamot peal

2 t.sp. Coriander seeds ground

2 Red onion

1 tb.sp. Garlic

3 tb.sp. Palm sugar

1 tb.sp. Fish Sauce

3 tb.sp. Tammarine juice

2 cups Coconut milk

1/4 cup Vegetable Oil

Ingredients Cucumber Sauce:

1/2 Cup vinegar

1/2 Cup water

1 t.sp. Salt

1/3 Cup Sugar

4 Red onion chopped

3 red chillis

4 cucumber


Cooking :


Satay


- Slice pork into 1" width, 5" length, 1/4" thick

- Mix other ingredients in a bowl, add pork and leave in the bowl for minimum 2 hours in the fridge

- Soak bamboo sticks in water before skewing (this will protect the sticks from burnt easily on the charcoal)

- Skew pork meat on the sticks and place on dish ready for grilling

- While grilling, season with coconut milk


Peanut Sauce

- For Peanut Sauce, fry (without oil) peanut until slightly brown

- Grind all ingredients except for oil

- In a pan, add vegetable oil and once heated add all ingredients

- Bring to boil


Cucumber Sauce

- Mix vinegar, water, salt and sugar until dissolved
- Add chilli and cucumber

Sunday, May 24, 2009

Buying food from Asian Groceries

Cooking Thai and other Asian dishes, you might have to find some specific ingredients from Asian stores or Asian groceries. You won't have a problem if you have China Town not so far away from you, or you could find some online Asian stores from the internet.

In case that you have difficulties in finding ingredients from Asia (or Thailand for specific), you just have to adapt from whatever you can find. As you already know that the main ingredient of Thai Food is Thai chilli. Although not all dishes contain chilli, but if you can't find Thai chilli, you can simply replace it with other chilli, depending on where you are. For other herbs like lemon grass, Bai Kra Prao, Bai Ma Grood and others you might be able to find dry ones. Unless, you can't find, perhaps the local herbs with spicy scent will do. Or coconut milk, instead of fresh coconut milk, you may use powdered coconut milk that you dissolve in water. It's always possible to modify.. although your dish may be totally different from original Thai.. but it's alright! You're free to design the ingredients and be proud of it!

Saturday, May 23, 2009

Goong Phad Pong Kari - Fried Shrimp with Curry Powder and Egg

Phad Pong Kari is another delicious dish which needs some technics to cook. This Thai dish is mild and my Japanese friends really like this dish, either Poo Pad Pong Kari (Fried Crab with Curry Powder) or Goong Pad Pong Kari (Fried Shrimp with Curry Powder). The tip is that you have to beat the egg, curry powder and chilli paste (Nam-Prik-Pao) together and pour into the pan after the shrimp is cooked. Let's start!


Ingredients:
300 g Shrimps (8-10)
1 Onion
6 Celeries (Bai Kuen-chai)
2 Onion leaves (Ton Hom)
1 Big Red Chilli (Prik-Chi-Fah)
1 tb.sp. Garlic chopped
2 Large eggs
1 tb.sp. Curry powder
2 tb.sp. Chilli paste (Nam-prik-pao)
2 tb.sp. Oyster sauce
1/2 tb.sp. Soy sauce
1/2 cup cream
1 tb.sp. Sugar
3 tb.sp. Soya Oil

Cooking:
- Prepare the shrimp by pealing off the shell, take off the heads and clean
- Chop celeries and onion leaves in 1" size, chop onion vertically into 8 sections, and slice red chilli
- Beat the egg, curry powder, sugar, oyster sauce, soy sauce and chilli paste together
- Heat the pan (use high), add the oil, and throw in the garlic, stir
- Add the shrimp, stir until the tails turn red
- Add onion
- Add HALF of the egg preparation, stir until cooked
- Add celeries, onion leaves and chilli
- Add the other HALF of egg preparation, quickly stir for another 20-30 seconds
- Serve on the dish

Saturday, May 16, 2009

Dulce de leche Tart


It's not Thai menu this time! Last night I tried a new recipe using 'Dulce de leche' that I brought from Argentina several months ago. In Argentina, I had Dulce de leche with toast and also some cookies or biscuits also contain this. I really love the taste and smell of this which is more like caramel. I knew that Dulce de leche is made from boiling condensed milk until brown.. so.. I will look into that recipe when this jar is finished.
As a Thai, I don't think there are many Thais who know Dulce de leche, but it's something that my wife really loves! It was pretty tough for me to think which recipe I should use to make something nice for our dessert last night. It took me the whole day planning for this menu and until I started baking the bottom part, I still had no idea what I should finish on the top!! After 10 mins in the oven, I decided to use crumb on top of Dulce de leche layer. Let's try this.. it's really really yummy!!
Ingredients:
1/2 cup salted butter (most recipes use unsalted butter but I had only salted one..)
1 cup white sugar
1 egg large
1 cup Graham cracker (coarse ground)
3/4 cup all purpose flour
1/2 t.sp. baking powder
3/4 cup Dolce de leche (or caramel)
Ingredients for crumb topping:
1/2 cup salted butter
1/2 cup sugar
1 cup all purpose flour
Cooking:
- Preheat the oven at 175 C
- Beat butter and sugar with mixer until pale cream
- Add the egg, mix another 2 minutes
- Add cracker, flour and baking powder, gently fold to mix with the butter. Do not mix too much.. softly fold is good enough.
- In a 9"x13", pour the mixture into it and bake in the oven for 15 minutes
- While baking, you need to prepare the crumb. Put all crumb ingredients into a bowl and I use fork to break the butter (the butter should be hard, I left it in room temperature for 30 minutes but not melt)
- Keep breaking until all the butter, sugar and flour looks like sand
- Bring out the tray from the oven. Spread Dulce de leche on it. Then top with crumb.
- Bake for another 15 minutes.
- Leave for 15 minutes and cut into 8-10 pieces
This tart is good when it's colder. But my wife likes it more when it's hot because the caramel smells much better when it's melt! This is very easy and really really delicious!! I guarantee!

Thursday, May 14, 2009

Pad Bai Kra Prao Tofu and Shrimp with Crispy Basil


This is a healthy menu because we use Phad Kra Prao recipe and serve it on pan-fried tofu.

This is a spicy menu but delicious. You can use less chilli if you want it milder.

Ingredients:

3 tb.sp. vegetable oil (I use soya oil)

1 tb.sp. garlic

2 1/2 tb.sp. chilli (mixed of red and green)

100 g minced pork

8 shrimps

2 egg tofu (can be any kinds of tofu but egg tofu is nice and soft, you can use 2 tubes of tofu)

3 mushrooms

4 baby corns

2 tb.sp. fish sauce

2 tb.sp. oyster sauce

1/2 cup chicken soup

1 tb.sp. Chilli paste (Nam-Prik-Pao)

1 t.sp. white sugar

1 cup fresh basil leaves (Bai-Kra-Prao : half is used fresh and the other half for deep fried as topping)

Cooking:

- Deep fry 1/2 cup of basil leaves until crisp, rest on towl to reduce some oil

- Heat vegetable oil in the pan

- Cut tofu in 1" size, fry on the pan until light brown, place on the dish

- Add more vetable oil in the pan

- Add chilli and garlic, stir until light brown

- Add shrimps and minced pork, stir until cooked

- Add fish sauce, oyster sauce, sugar and chicken soup

- Once boiled, add mushrooms and baby corns then the rest of fresh basil leaves

- Serve on the tofu and top with crisp basil leaves

Tuesday, May 5, 2009

Crispy Omelette


Eggs are the basic ingredients that everyone has at home. Usually when I cook eggs, I make into omelette with various of vegatables like tomato, onion, carrots and some minced pork.


But in Thailand, when we go to Thai food restaurant they usually have an egg menu called Khai Foo or fluffy omelette. The idea to make omelette fluffy is not difficult.. but how to make it fluff and crispy for at least 15-20 minutes is difficult! So, I want to share my experience how how to make omelette crispy for long time.


Ingredients:
- 3 large eggs, room temperature
- 1 tb.sp. Fish sauce
- 2 t.sp. Crispy flour (any deep-fry flour)
- 1 t.sp. lime juice
(you may add vegetables or meat in your omelette although it will soften the omelette a bit but it's better nutrition)
- 3 tb.sp. palm oil
Cooking:
- Beat the egg until it becomes bubble
- Add fish sauce, crispy flour and lime juice, mix well in the bowl
- Heat up your pan until a little smoke
- Pour the egg slowly from high position into the pan. Usually 60-70 cm would do. But be careful since the oil may spill out of the pan and you won't like to get burnt!!
- Turn upside down after seeing the bottem side slightly golden brown
- Serve on the flat dish

Sunday, May 3, 2009

Cooking Jasmine Rice in Microwave

Last week I wrote a blog about how to cook sticky rice using microwave. But I've realized that some people are also interested to know how to cook plain rice like Jasmine Rice with Microwave. Most of Asian families have rice cooker.. but this is not common if you're not an Asian. But if you like the taste of Asian food, especially they are nice with steamed rice, you don't need a rice cooker. Just your microwave can do.

This is a very simple way to cook Jasmine Rice with microwave.


1. Measure 1.5 cup of Jasmine Rice and rinse with water, put in the microwavable bowl


2. Add 2 cup of water into the bowl


3. Put in the microwave on High for 10 minutes


4. Bring the bowl out of the microwave and use a spoon or a spatula to stir the rice in the bowl. At this point, the rice is not yet cooked.


5. Put back in the microwave for another 5 minutes on High.


6. After this the rice should be well cooked and ready to eat.


Green Curry Spaghetti


We can easily mix and match Thai and western food. One of my wife's favourite combination is Green Curry with Spaghetti. In Thailand, we have a type of rice noodles called Khanom Jeen. This type of noodles is freshly made and cannot store longer than a day. We usually have Khanom Jeen with different curries or sauces. However, the combination of Khanom Jeen and Green Curry is one of the most delicious.

Due to the difficulty of Khanom Jeen storage, and not so easy to buy if you're not in Thailand, we apply to use Spaghetti instead of these rice noodles.


Ingredients:

200 g Spaghetti
400 g sliced chicken breast
200 ml coconut milk and 100 ml of coconut cream
2 t.sp. Green Curry paste (or Thai green curry powder which you can buy from local supermarket)
2 bell peppers, red and green
2 eggplants
1 cup fresh basil, chopped roughly

Cooking:

Prepare spaghetti by boiling in the water for 8-10 minutes.

Cut the chicken into small pieces and pre-cook it gently in a pan with drops of oil.

Mix the coconut milk, the coconut cream and the green curry paste in a bowl

Add the peppers and baby eggplants to the chicken and cook for few minutes

Add the sauce to the chicken and cook gently for 10-15 min

Add the basil 5 min before the end

Serve on top of spaghetti and decorate with fresh basil and chilli.

Thursday, April 23, 2009

Thai Sticky Rice - Cooking with Microwave Oven


Sticky Rice is known as Khao Niew in Thai language. This type of rice has special characteristic which is different from plain steamed rice. It has some gluey effect, meaning the rice can be easily made into ball shape and stay like that. It's basically a different type of rice where you should be able to buy from any Asian supermarket.

Sticky Rice is a basic dish for many parts of Thailand especially the North and North-eastern. Traditionally, the way to steam sticky rice is quite complicated and time consuming. A special bamboo basket is used to hold the sticky rice (raw) and placed on top of boiling pot. After 25-30 minutes of steaming, you will get a nice and soft sticky rice. But before that the sticky rice should be soaked overnight. And while steaming you should frequently stir the rice in the basket.

However, in Thailand we can easily buy cooked sticky rice every corner so many people don't really want to cook by ourselves due to the time and energy required. We can easily buy 5 baht of sticky rice and that fills up our stomach for half a day.

Sticky rice can also be cooked using a microwave. Many of the Thais who live abroad have been cooking Sticky Rice with Microwaves for long time ago. Here's how I do it.

Ingredients (4 servings)
2 cups sticky rice
2 1/4 cups water
(water should cover 1 cm over the rice level, so you can adjust the amount of water depending on your bowl)

How to cook:
- Rinse Sticky rice with water 2-3 times
- Pre-soak the rice in a big soup bowl (microwavable) for 30 minutes
- Microwave 7 minutes at HIGH
- Bring out the bowl and use the fork to let the air into the rice so it doesn't stay too sticky
- Put back into the microwave on HIGH for another 2 minutes, bring out and work with the fork again
- Microwave another 2 minutes on HIGH, you should get a nice and soft sticky rice by microwave

Although cooking Sticky Rice with Microwave is not as dry as the bamboo basket, but in general it's softer and much faster to cook. Let's try.

Saturday, April 11, 2009

Phad Kra Prao Kai (Chicken with Basil and Chili)


Basil leaves in this recipe make this dish unique in the scent and taste. Thai Basil or Holy Basil can be grown in tropical countries. But after Thai food restaurants and asian stores can be found everywhere, it's not so difficult to buy 'Bai Kra Prao'.

Phad Kra Prao Kai is an easy dish. Many Thais make this recipe as individual dish, just like Pad Thai. Original taste of this dish is salty, spicy and slightly sweet.

Ingredients:
2 tb.sp. vegetable oil
3 cloves garlic, minced
6 mid size chilis, coarse minced
200 g chicken breast, sliced
2 tb.sp. fish sauce
2 tb.sp. oyster sauce
1 1/2 t.sp. sugar
1/2 cup basil leaves (as much as you want)

Cooking:
1. Preheat the pan and pour in vegetable oil (I always use soya oil for frying)
2. Throw in the garlic, stir until light brown
3. Add chili (make sure not to breath in)
4. Add chicken, stir until cooked
5. Add fish sauce, oyster sauce and sugar
6. Add basil leaves and quickly turn a few stirs then serve on a dish with steamed rice

Tom Yum Kung Recipe


Tom Yum Kung is a Thai spicy soup with lemongrass and other herbs. This soup is very good nutrition. The right flavour is spicy and sour.

Ingredients:

3 cups chicken stock
250 g shrimps/prawns,shelled and divided
2 garlic cloves, minced
5 leaves kaffir lime leaves
3 slices fresh or dried galangal (Kha) 1/4 cup fish sauce
2 stalks lemon grass/citronella (ta-krai), lower1/3 portion only, cut into 1-inch (2.3 cm) lengths
5 hot green Thai chilli peppers (can be less if you are not familiar with spicy taste)
1/2 cup sliced straw mushrooms
1/4 cup lime juice
1 teaspoon chilli paste (nam phrik pao - can be found in asian stores)
1 tablespoon chopped coriander leaves
Cooking:

Bring the stock to a boil over medium heat. Add the garlic, lime leaves, galangal, fish sauce, lemon grass, and shallots, then the mushrooms and chilli peppers, if using.Simmer for 2 minutes.
Add the shrimp and reheat to boiling. Cook until the shrimps are pink,opaque, and firm but no longer than 1 minute.
When the shrimps are cooked, place the lime juice and chilli paste in a serving bowl.
Pour the soup into the bowl, stir, and garnish with cilantro leaves.
Tips:

You can add 1/2 cup of cream in step 2 to make this soup creamy and milder in taste. A bit of sugar (1 t.sp.) can be added if you want.

Chicken Green Curry (Kang Khiew Waan Kai)


Green Curry is another well known dish of Thai food. Thai people loves to have green curry with rice noodles (called Khanon-Jeen) or rice. Some Thais eat green curry with Roti.

The taste of green curry is mild, slightly sweet and not too spicy.

Ingredients:

400 g sliced chicken breast
200 ml coconut milk and 100 ml of coconut cream
2 t.sp. Green Curry paste (or Thai green curry powder which you can buy from local supermarket)
2 bell peppers, red and green
2 eggplants
1 cup fresh basil, chopped roughly
Cooking:

Cut the chicken into small pieces and pre-cook it gently in a pan with drops of oil.

Mix the coconut milk, the coconut cream and the green curry paste in a bowl

Add the peppers and baby eggplants to the chicken and cook for few minutes

Add the sauce to the chicken and cook gently for 10-15 min

Add the basil 5 min before the end

Thursday, April 9, 2009

Favourite Pad Thai Recipe


Pad Thai is one of the most famouse dish of Thai Food. This is more like a one-dish menu. Most of Thai food we eat many dishes with rice. But for Pad Thai, it's the individual dish.


This recipe is very easy to cook. The major ingredient is Tamarind Sauce. In tropical countries, you can make this sauce by soaking tamarind in warm water, then squeeze and filter the sauce. In some places, you can find 'ready mixed' Pad Thai sauce, which can make our lives easier.

Ingredients:
2 tb.sp. vegetable oil
1 egg (preferably duck egg)
4 t.sp. fish sauce
2 red onions, sliced
8 shrimps (you can add more if you want)
4 tb.sp. ground peanut
3 tb.sp. Tamarind Sauce
1 pack for 1 serve rice noodles (dry noodles - soak in warm water for 5 mins, not too long!!)
1 1/2 cups bean sprouts
1/2 cups Tofu sliced
1/2 cups Chinese Chives, chopped into 1/8" dice
1 t.sp. dried chili powder (could be less if you're not the spicy person)
2 t.sp. sugar
2 onion trees, chopped 1"

Cooking:
1. Heat up the fry pan, put the oil into the pan until smoked
2. Put red onion, stir until light brown
3. Add Shrimp, tofu, Chinese Chives, stir until shrimp is cooked
4. Rest rice noodles and let water rinse, then put into the pan
5. Add Tamarind Sauce, fish sauce, sugar stir until well mixed
6. Add Ground Peanut and Chili powder
7. Make a hole in the middle of the pan, add a bit of oil, knock the egg in there, leave until bottom is hard
8. Stir everything in the pan, try to keep the egg flat
9. Add bean sprouts and onion trees
10. Serve on a dish with fresh bean sprout, lime, and banana flowers (optional), better eat while hot

Omelette with shrimp and chili


My wife always convinces me to cook. And we find that I am a pretty good cook. Although everytime I cook, it will be something different. I don't really care about the recipe but after a while, I found that having the recipe is helpful.. but we don't need to be very strict on that.

Each family has different preference in taste and styles. For me and my wife, we prefer rather tasty food. Since we are Thai, the main ingredients we always use are chili and garlic. Even when we cook some western style, we also add chilli.

Today I will give you a simple recipe which you can make within 10 mins, "Omelette with Shrimp and Chili".

Ingredients:
3 cloves garlic mid size
3 Large Eggs, fine beated
15 Shrimps, peal off skin, head and tails
1/2 t.sp. sugar
1 tb.sp. vegetable oil (I use soya oil)
6 Thai chilis (prik-ki-noo)coarse blended
2 t.sp. Fish sauce (if not, soy sauce can do)
a bit of pepper and coriander/parsley for decoration

Cooking:
1. Pre-heat non-stick pan, high heat, put soya oil in the pan
2. Once the pan gets warm, put garlic and stir until slightly yellow
3. Add shrimps, stir until cooked then add chili (at this point, you may sneeze so be careful) add sugar
4. Add fish sauce to the beaten egg, slowly pour beaten eggs into the pan, turn your pan so the egg is flatten
5. Turn down the temperature on your gas stove to medium
6. When the egg starts to cooked on the side, stir gently until well cooked
7. Put the egg on the dish, add a bit of pepper and decorate with coriander leaves